There are many reasons why you (as an administrator) need to export Exchange mailboxes or other resources to PST. Let’s go through the list of possible reasons.
- You need to decommission the server after migration to another server or Office 365. The mailboxes need to be exported and archived for historical purposes.
- A user has left the company and the mailbox needs to be removed. The data needs to be extracted and archived for future references.
- The user needs to archive all the data to PST file so as to reduce the mailbox size.
- Before migration to Office 365 or a newer Exchange Server, some mailboxes will not be needed anymore and an archive must be kept.
- The management like to reduce the number of mailboxes or spring clean old mailboxes which are not used anymore and archiving of such mailboxes is needed.
In this article, we will be going through different methods with stepwise process to export mailboxes from the Exchange Server database to the PST file format.
Methods to Export Exchange Mailboxes to PST
Below, we will discuss the step-by-step process to export Exchange mailboxes to PST using the PowerShell commands, Exchange Admin Center (EAC), and a third-party EDB to PST converter tool.
Method 1: Export Exchange Mailboxes to PST using PowerShell
You can use PowerShell commands in Exchange Management Shell (EMS) to export mailboxes to PST. This method comes in handy when you need to export several mailboxes as you can create scripts to export multiple mailboxes at once. However, you must consider the expertise needed to execute the commands and the performance of the server.
Before going ahead with the export, you need to fulfil some prerequisites. You need to ensure that the user must have the right roles and permissions assigned. To assign the required roles and permissions, you can use the Exchange Admin Center (EAC) or PowerShell commands.
To assign the roles from the Exchange Admin Center (EAC),
- Log into the portal and click on Permissions and Admin Roles.
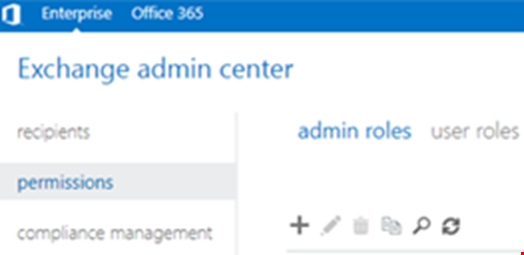
- Click on the plus button and create a new role.
- Assign the role of Import/Export and add the user you will be using to export the data.
If you would like to set the permissions through PowerShell, you can use the below commands.
New-ManagementRoleAssignment –Role "Mailbox Import Export" –User "<Username>"

New-ManagementRoleAssignment -Role "Mailbox Import Export" -SecurityGroup "Organization Management" -Name "Import Export"

It is to be noted that you cannot store the PST files on a drive. The destination must be a network share. You need to create a folder and share it with the respective user and the Exchange Trusted Subsystem (see the below image).

Once this is ready, you can go ahead and use the New-MailboxExportRequest command to export mailbox to PST (see the below example).
New-MailboxExportRequest -mailbox <user> -filepath "<unc path>"

This will queue the request and start exporting the mailbox.
To get information on the status of the export, you can use the Get-MailboxExportRequest command.
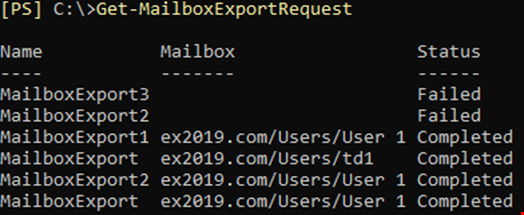
This is a simple command to export a mailbox to PST with no criteria. You can also apply some criteria when exporting. For example, to include specific folders to export, you can use the below command.
New-MailboxExportRequest -Mailbox 'user-a ' -Filepath "\\Exchange\PST_Export\User-a.pst " -IncludeFolders "#Inbox# ", "#Outbox# "

If you want to exclude folders, then you can use the command as given below.
New-MailboxExportRequest -Mailbox 'user-a ' -Filepath "\\Exchange\PST_Export\User-a.pst " -ExcludeFolders "#Spam# ", "#Outbox# "

To export emails based on dates, you can use the command with the Content Filter option using the lt (less than) and gt (greater than) parameters.
To export emails older than a particular date, use the below command:
New-MailboxExportRequest -ContentFilter {(Received -lt '01/01/2020')} -Mailbox user-a ' -Filepath "\\Exchange\PST_Export\user-a.pst"

To export emails from a particular date, execute the below command:
New-MailboxExportRequest -ContentFilter {(Received -gt '01/01/2020')} -Mailbox vuser-a ' -Filepath "\\Exchange\PST_Export\user-a.pst"

You can also combine the above parameters to export emails between particular dates. For example, you can use the below command to export emails between 1st January, 2020 and 1st July, 2020.
New-MailboxExportRequest -ContentFilter {(Received -gt '01/01/2020') -and (Received -lt '01/07/2020')} -IncludeFolders "#Inbox#" -Mailbox "td1" -FilePath "\\localhost\c$\PSTFiles\td1_3.pst"

Method 2: Export Exchange Mailboxes to PST using the Exchange Admin Center (EAC)
You can also export mailboxes to PST using the graphical user interface (GUI)-based Exchange Admin Center (EAC). The prerequisites are the same as mentioned in above method. Here’s the process to use the EAC for exporting mailboxes to PST:
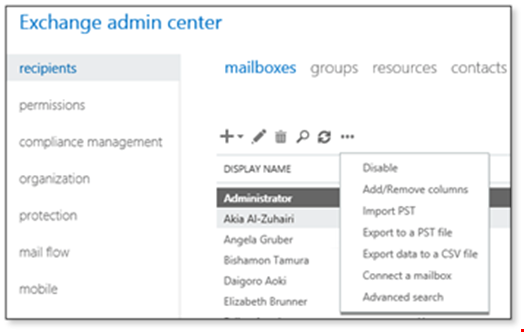
- Load the Exchange Admin Center and log into the server with the right credentials.
- Click on Recipients, right-click on the user, and click on Export to a PST file.
- Select if you would like to export the mailbox or the mailbox archive and then click Next.
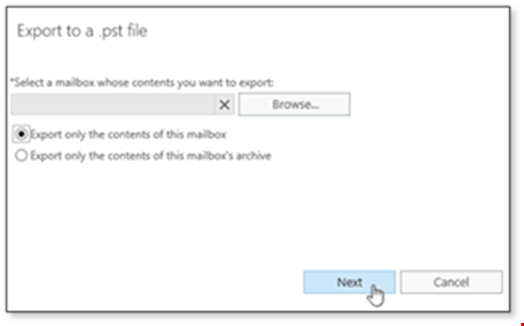
- In the next window, specify the path to export the mailbox to (which is same as the PowerShell method).
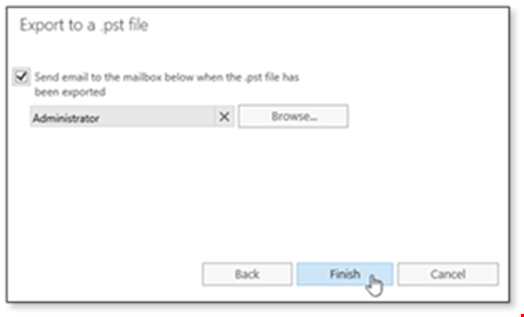
- Select the notification method and then click on Finish to start the export.
Method 3: Export Exchange Mailboxes to PST using a Third-Party Tool
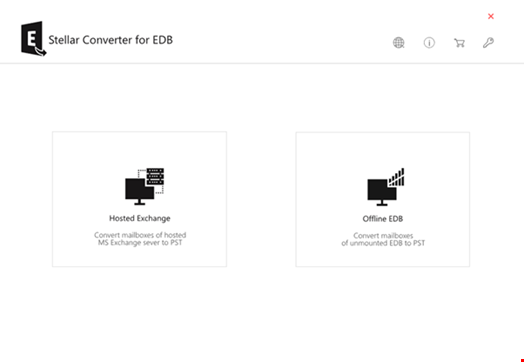
For quick and hassle-free export, you can use a third-party EDB to PST converter tool, like Stellar Converter for EDB. This tool can open Hosted Exchange databases and offline databases of any Exchange Server version. It doesn’t require any special permissions to export the mailboxes. You just need to select the database file and follow some simple steps to complete the export process.
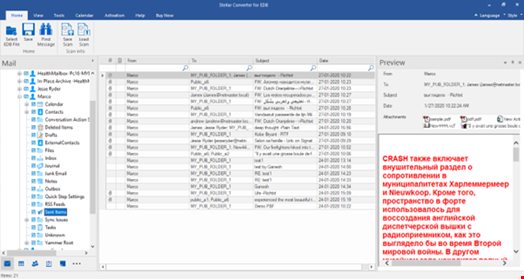
Once you select and open the Exchange database, you can browse through the datastore in an Outlook-like interface.
You can click on a mailbox or item to see its preview.
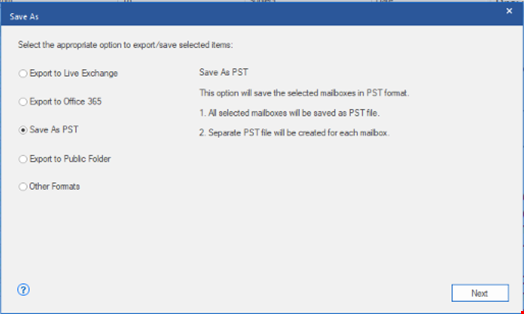
You can granularly select the mailboxes to export and the criteria to export. Then, you can go ahead and export the selected mailboxes to PST.
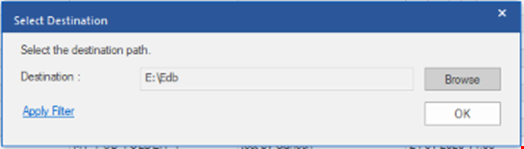
You can click ‘Browse’ to choose a save location.
Conclusion
Above, we have explained different methods to export Exchange mailboxes to PST. However, the best method is to use Stellar Converter for EDB as it offers easy export of not just mailboxes but also of user archives, shared mailboxes, disabled mailboxes, and even public folders. It can open orphaned or live Exchange Server databases. With Stellar Converter for EDB, you can increase the export performance and securely export the mailboxes with no size limit. The tool also allows to export the mailboxes from EDB to live Exchange Server database or Office 365 directly, with automatic mailbox matching and parallel export