Do you keep getting an error saying that Outlook can't open your data file? Or does it look like your mailbox might be damaged because you can't access specific messages or folders? The chances are you're dealing with a corrupt PST file. And it's for this reason that Microsoft includes a data recovery utility called the Inbox Repair Tool (or SCANPST.exe) with your Outlook installation.
In this tutorial, we'll show you how to locate and run the Outlook Inbox Repair Tool to fix a corrupt PST file. This tool doesn't always work, which is why you'll also learn how to use Stellar Repair for Outlook to recover your data.
Back Up Your Data Before You Begin
The Outlook Inbox Repair Tool creates a PST backup before it attempts to fix any data corruption issues. That way, you have an unmodified file in case something goes wrong during the recovery process.
However, if you prefer being extra safe, you can always perform a manual backup by creating a simple copy of the file.
To locate and back up the PST file for an email account in Outlook:
- 1. Open Microsoft Outlook.
- 2. Select File on the menu bar.
- 3. Under Info, select Account Settings, then Account Settings again on the drop-down.
- 4. Switch to the Data Files tab.
- 5. Select the email account related to the corrupt PST file and choose Open File Location.
- 6. On the File Explorer window that opens, right-click the PST file and select Copy.
- 7. Go to a different location, then right-click and select Paste.
How to Location and Run Outlook's ScanPST Tool
To use Outlook's Inbox Repair Tool, you must manually locate it inside your Microsoft Office or 365 installation. Start by fully exiting Outlook, and then:
- 1. Open a File Explorer window.
- 2. Select This PC on the sidebar.
- 3. Double-click Local Disk (C:) or the drive containing your Windows installation.
- 4. Go to Program Files > Microsoft Office > root > Office 16.
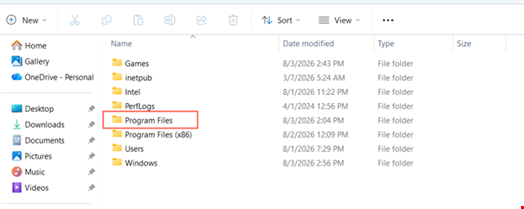
Note: If you don't see Microsoft Office within Program Files, go back and check inside Program Files (x86).
- 5. Scroll down the list of files until you see SCANPST. To get it to faster, type SCANPST into the Search bar on the top right.
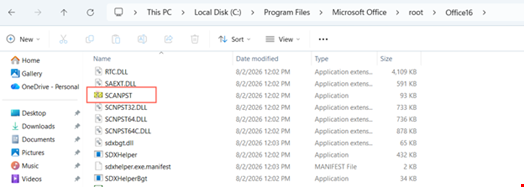
- 6. Right-click SCANPST and select Run as Administrator.
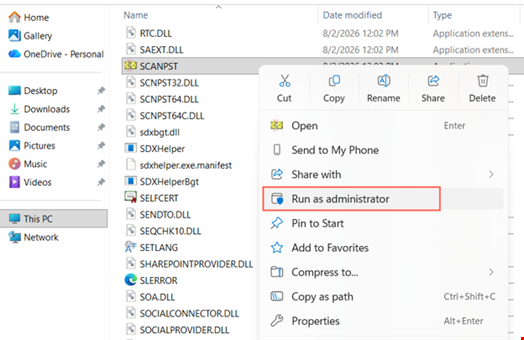
- 7. Select Yes on the User Account Control dialogue.
- 8. Select Browse and navigate to the location of the corrupt PST file. If it's in its default location, type the following path into the address bar of the file picker, replacing [your_username] with your Windows user name, and press Enter:
C:\Users\[your_username]\AppData\Local\Microsoft\Outlook
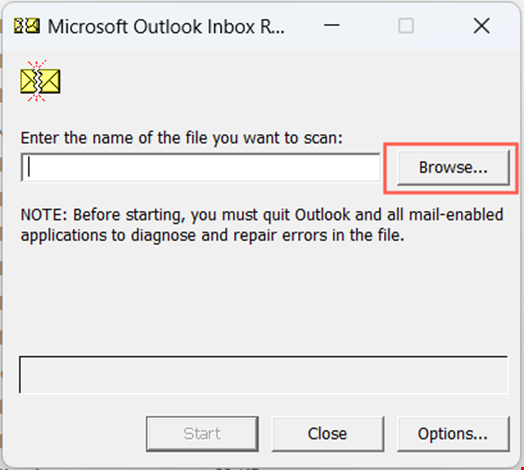
- 9. Select the PST file and choose Open.
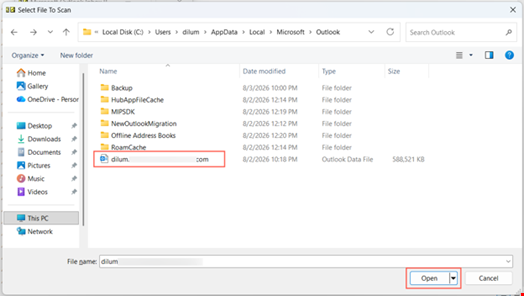
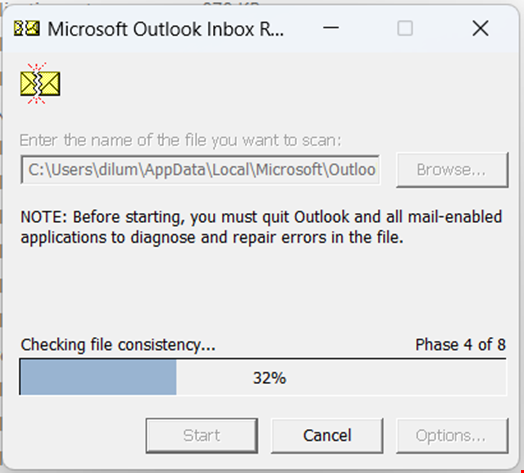
- 10. Select Start. Wait as the tool checks the file for errors.
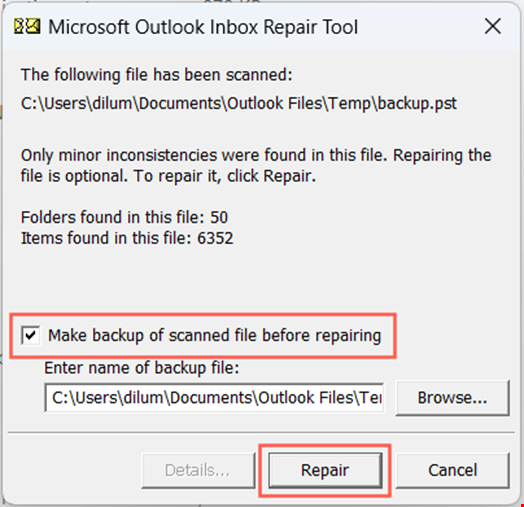
- 11. If there are errors to fix, check the box next to Make backup of scanned file before repairing (if you didn't back up your PST file manually) and select Repair.
- 12. Wait. The Inbox Repair Tool will repair the original PST file and create a backup copy with the .bak extension in the same directory.
- 13. Select Close on the Repair Complete pop-up.
- 14. Open Outlook and check if your mailbox opens without issues.
How to Install and Use Stellar Repair for Outlook
If Outlook's Inbox Repair Tool couldn't find errors in your PST file, didn't actually fix anything, or if you had trouble using it because it'd crash or stop responding, it's time to look at third-party recovery options.
We recommend Stellar Repair for Outlook. It lets you scan and view the contents within PST files, fixes files under 500MB for free, and even exports data to alternative file formats. It also runs offline so your data never leaves your computer.
To use Stellar Repair for Outlook:
-
1. Go to StellarInfo and download the Outlook PST repair tool.
- 2. Double-click the downloaded file and follow the steps on screen to install the program.
- 3. Launch Stellar Repair for Outlook from the desktop or Start menu.
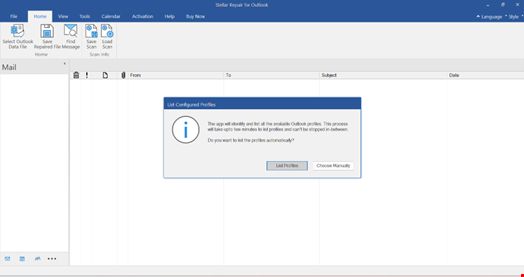
- 4. Select the Select Outlook Data File button on the top left.
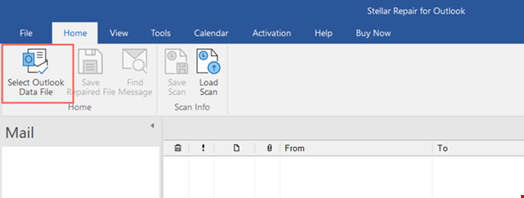
- 5. You'll be asked to List Profiles or Choose Manually. If you choose the former, the tool will list your Outlook profiles and their related data files. If you pick the latter, you can choose the file manually.
- 6. Select Repair.
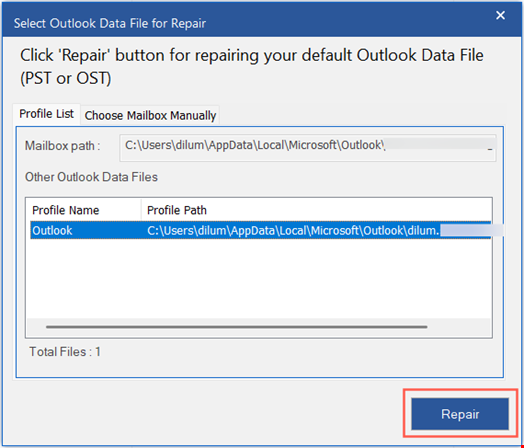
- 7. Wait as Stellar Repair for Outlook recovers the data within the file.
- 8. Select OK on the Repair Complete pop-up.
- 9. Use the navigation area on the left to go through folders and emails. You can preview items on the right pane.
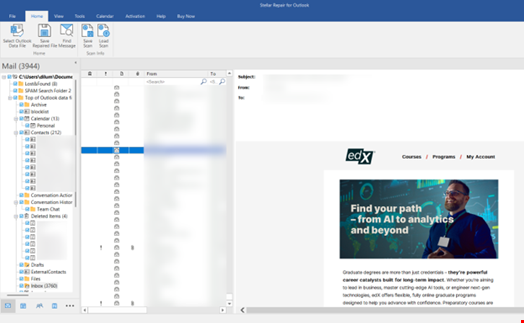
- 10. If you want to save the file, select Save Repaired File. You must purchase a license.
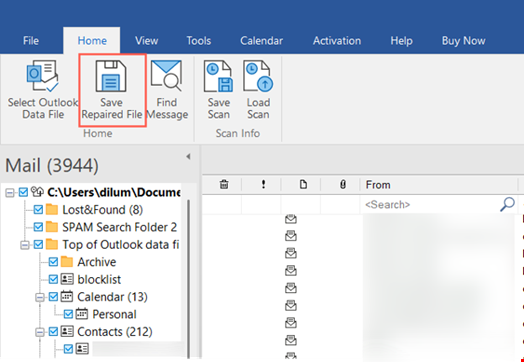
Note: You can use the left pane to exclude anything you don't want to recover.
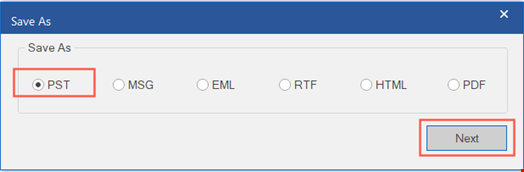
- 11. On the Save As dialog, keep the default PST radio button selected and choose Next. If you want to export your data to a different format, select between MSG, EML, RTF, HTML, or PDF.
- 12. Enable Recover deleted items to include deleted items in the repaired file and Auto split PST file to split files that are too large.
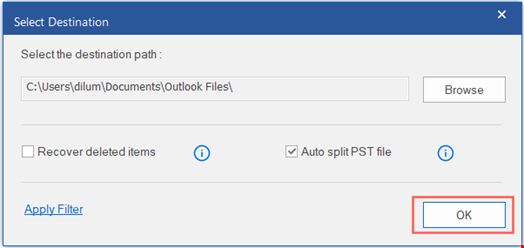
- 13. Select OK. You will find a file labeled Repaired in the same directory as the original PST. The original file remains unmodified and acts as a backup.
Note: Stellar Repair for Outlook does not repair the original PST file, so you'll have to import your data from the repaired file. To do that, open Outlook, go to File > Open & Export > Import/Export, and select Import from another program or file > Outlook Data File (.pst).
Alternatively, you can use Stellar's free PST repair to scan, preview, and fix PST files (as long as they're under 500MB). It uses a secure connection, and the entire recovery process is fully automated; you don't need to install any software. Just head over to the web app, select Repair PST file, create an account, and upload the PST file.
Wrapping Up
There are no sure-fire ways to avoid PST corruption issues, but there are a few things you can do to shift the odds in your favor. These include preventing your PST files from getting too big, avoiding sketchy add-ins, and making it a habit to properly exit Outlook/shut down your computer.
If the worst happens, use Outlook's Inbox Repair Tool. It's not exactly reliable, but it doesn't hurt to quickly run it. If that fails, Stellar's downloadable PST repair tool or Free Online PST repair service should help you get your data back.